You don’t need to be a tech expert to make your website smarter.
Integrating your Calenlead calendar is designed to be simple, fast and accessible to everyone. In just a few clicks and without any technical knowledge, you can turn your website into a real assistant available 24/7.
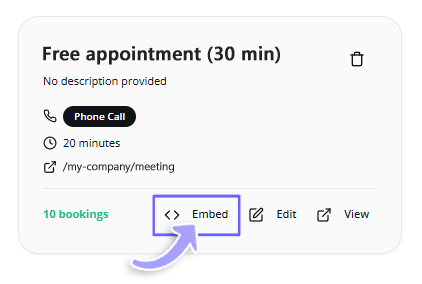
Before adding your calendar to your website, you need to retrieve your “magic link.” This is the code that will display your booking calendar.
Choose the platform you use for your website.
WordPress is the most widely used website platform in the world. Good news: you don’t need any additional plugins to integrate Calenlead. This method works with all themes: Astra, Divi, OceanWP, etc.
Go to your WordPress dashboard, then to the “Pages” section. Click on the page where you want your clients to book an appointment, for example your “Contact” or “Booking” page.
Where you want the calendar to appear, click the “+” button (Add block) and search for “Custom HTML”.
Simply paste the code you copied from Calenlead into the text area that appears. Then click “Update” or “Publish” at the top right of your WordPress page.
Congratulations! Your calendar is now live and ready to receive your first bookings.

WordPress is the most widely used website platform in the world. Good news: you don’t need any additional plugins to integrate Calenlead. This method works with all themes: Astra, Divi, OceanWP, etc.
Go to your WordPress dashboard, then to the “Pages” section. Select the page where you want your clients to book an appointment (for example your “Contact” or “Booking” page) and click on “Edit with Elementor”.
Where you want the calendar to appear, click the “+” button (Add element) and search for “HTML”.
Simply paste the code you copied from Calenlead into the text area that appears. Then click “Update” or “Publish” at the top right of your Elementor page.
Congratulations! Your calendar is now live and ready to receive your first bookings.
Add your Calenlead calendar to Shopify in just 3 clicks. Whether you want to offer consultation calls, customer support, or product demos, here’s how to do it.
Log in to your Shopify dashboard, go to Online Store> Themes, then click the blue “Customize” button on your active theme.
In the left panel, click “Add section” at the bottom of the list.
Select “Custom Liquid” or “Custom HTML”.
Paste the code you copied from your Calenlead dashboard into the text area on the right. Then click “Save” at the top of the screen.
That’s it! Your calendar is now integrated into your store and ready to turn visitors into customers.